Tutorial
Contents
Tutorial
Note
Did you find this article confusing? Edit this file and pull a request!
To start with, you will need GitHub, PyPi , TestPyPi and Codecov accounts. If you don’t have one, please follow the links to get it before you get started on this tutorial.
If you are new to Git and GitHub, you should probably spend a few minutes on some of the tutorials at the top of the page at GitHub Help
Step 1: Install Python Project Wizard with Jupyter Book (ppwjb)
Install ppwjb with pip:
pip install ppwjb
Step 2: Generate Your Package
Now it’s time to generate your Python package.
Run the following command and feed with answers:
ppwjb
Finally a new folder will be created under current folder, the name is the answer you
provided to project_slug.
The project layout should look like:
.
├── .GitHub
│   ├── ISSUE_TEMPLATE.md
│   └── workflows
│       ├── dev.yml
│       └── release.yml
├── book
│   ├── _config.yml
│   ├── _toc.yml
│   ├── api.rst
│   ├── authors.md
│   ├── contributing.md
│   ├── history.md
│   ├── index.md
│   ├── installation.md
│   └── logo.svg
│   └── references.bib
│   └── usage.md
├── ppwjb_0420_01
│   ├── cli.py
│   ├── __init__.py
│   └── ppwjb_0420_01.py
├── tests
│   ├── __init__.py
│   └── test_ppwjb_0420_01.py
├── .editorconfig
├── .flake8
├── .gitignore
├── .isort.cfg
├── .pre-commit-config.yaml
├── .python-version
├── LICENSE
├── Makefile
├── pyproject.toml
├── pyrightconfig.json
├── README.md
└── tox.ini
Here the project_slug is ppwjb_0420_01, when you generate yours, it will be your name.
Also, be noticed that there is pyproject.toml in this folder. This is the main poetry
configuration file of our project.
Step 3: Install Dev Requirements
You should still be in the folder named as project_slug, which containing the
pyproject.toml file.
Install the new project’s local development requirements inside a virtual environment:
make install-dev
make check
We start with install poetry, since the whole project is managed by poetry. Then we installed extra dependency need by developer, such as documentation build tools, lint, formatting and test tools etc.
We also launch a smoke test here by running tox inside make check. This will give you a test report
and lint report. You should see no errors except some lint warnings.
Note
Extra dependencies are grouped into three groups, doc, dev and test for better
granularity. When you ship the package, dependencies in groups doc, dev and test
might not be shipped.
As the developer, you will need to install all the dependencies.
Note
If you found errors like the following during tox run ERROR: InterpreterNotFound: python3.9
don’t panic, this is just because python3.x is not found on your machine. If you
decide to support that version of Python in your package, please install it on your
machine. Otherwise, remove it from tox.ini and pyproject.toml (search python3.x then
remove it).
Note for pyenv users
If you are using pyenv, see .python-version file which specifies exact version of python to be tried by tox.
Step 4: Create a GitHub Repo
Go to your GitHub account and create a new repo named mypackage, where
mypackage matches the [project_slug] from your answers to running
cookiecutter.
Then go to repo > Settings > Secrets, click on ‘New repository secret’, add the following secrets:
TEST_PYPI_API_TOKEN, see How to apply testpypi tokenPYPI_API_TOKEN, see How to apply pypi token
Step 5: Set Up Codecov Integration
Note
If you have already setup Codecov integration and configured access for all your repositories, you can skip this step.
In your browser, visit install codecov app, you’ll be landed at this page:
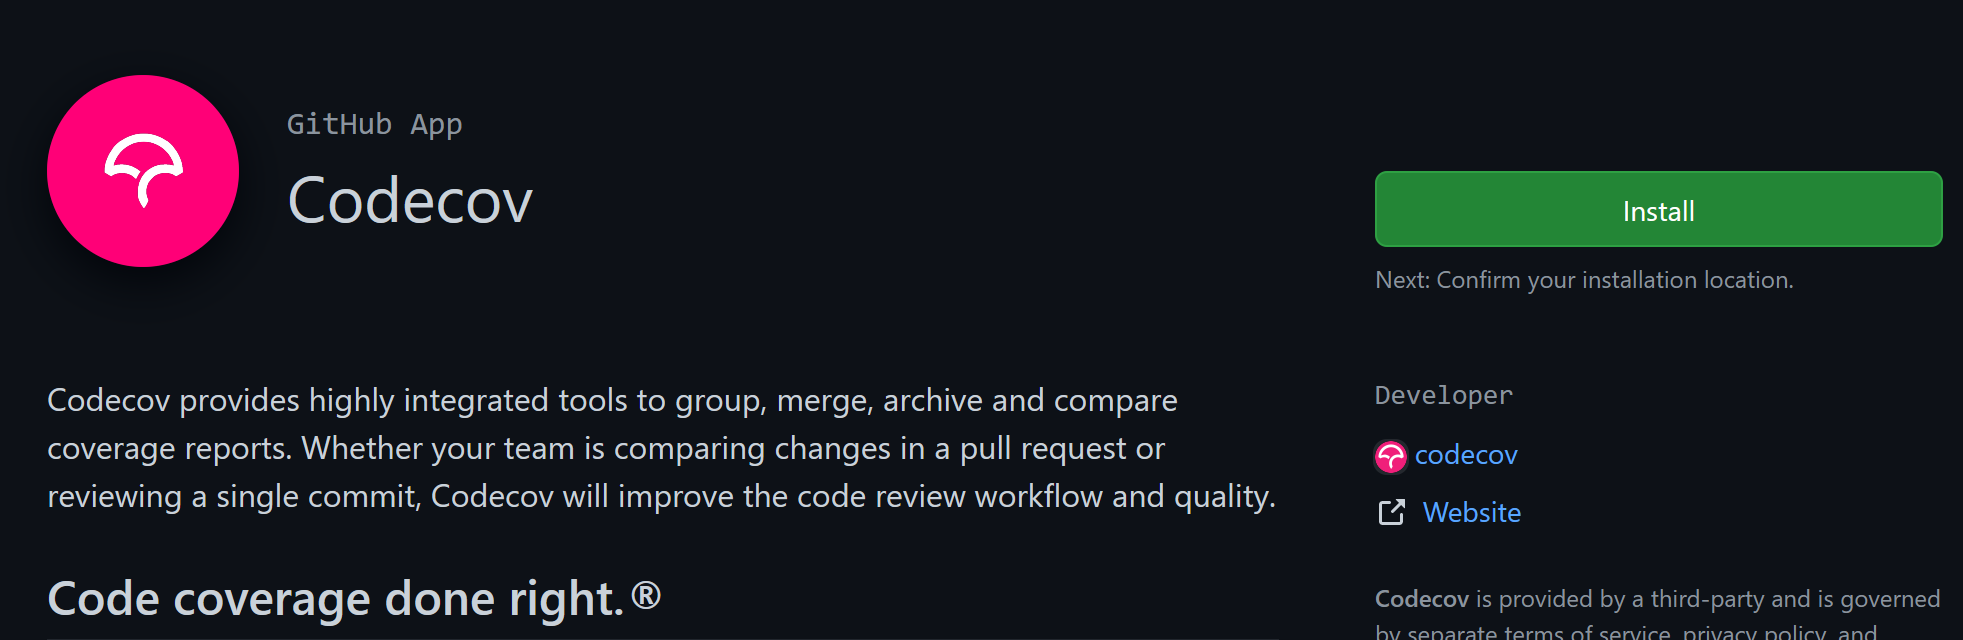
Click on the green Install button at top right, choose All repositories then click on Install button, following directions until all set.
Step 6: Upload Code to GitHub
Back to your develop environment, find the folder named after the project_slug.
Move into this folder, and then setup git to use your GitHub repo and upload the
code:
cd mypackage

git add .
git commit -m "Initial skeleton."
git branch -M main
git remote add origin git@GitHub.com:myusername/mypackage.git
git push -u origin main
Where myusername and mypackage are adjusted for your username and
package name.
You’ll need a ssh key to push the repo. You can Generate a key or Add an existing one.
Note
If you answered ‘yes’ to the question if install pre-commit hooks at last step,
then you should find pre-commit be invoked when you run git commit, and some files
may be modified by hooks. If so, please add these files and commit again.
Check Result
After pushing your code to GitHub, goto GitHub web page, navigate to your repo, then click on actions link, you should find screen like this:
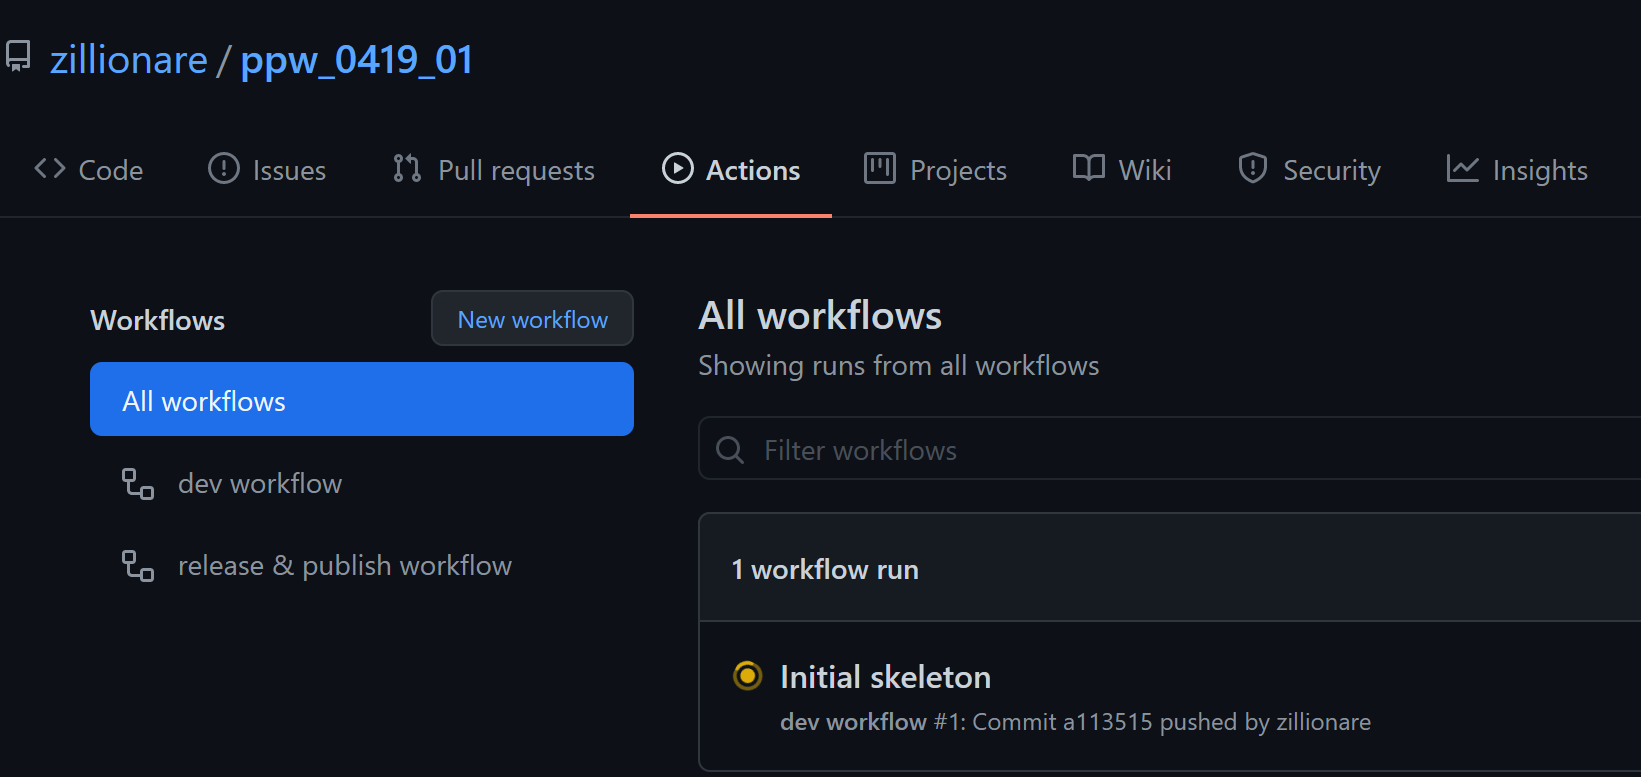
There should be one workflow running. After it finished, go to [testpyi], check if a
new artifact is published under the name project_slug.
Step 7. Check Documentation
Documentation will be published and available at https://{your_github_account}.github.io/{your_repo} once:
the branch is released
the commit is tagged, and the tag name is started with
vbuild/testing executed by GitHub CI passed
If you’d like to see what it’s look like now, you could run the following command:
ghp-import -n -p -f book/_build/html
then check your documentation at https://{your_github_account}.github.io/{your_repo}
Step 8. Make Official Release
After done with your phased development, switch to release branch, following instructions at release checklist, trigger first official release and check result at PyPi.